Showing posts with label Battle. Show all posts

Friday, 1 June 2018

Star Wars Armada

I know this has been out for a while but that's me, always late to the party, provided of course I actually get an invite. But enough social woes, I'm a wargamer I should be pleased with what I get, right?

Anyway, I purchased Armada about a year ago along with a few extra ships and only managed to get round to breaking the seal on the box last week, so it was a surprise to actually get a game in (first of the year!).

The scenario was simple as this was a learning process and taken straight from the book using the ships supplied by the core set. So for the Imperials there was a nifty Star Destroyer identical to the one in the opening sequence of the original film plus a half dozen TIE fighter squadrons. The rebels had a corvette and a Nebulon class cruiser, again familiar to watchers of the original trilogy, and four X-wing squadrons.

The setup was on a three foot square table with the opposing forces facing each other.

Turn 1
Not much happened in a very long round apart from a lot of page turning to find out how everything worked. The rules were split into two booklets Learn to Play and a Rules Reference. I admired the intention, get players up and running as quickly as possible but the split was annoying sometimes having to reference two or three pages to work out what was supposed to happen. There was the odd contradiction too which presumably Fantasy Flight, the manufacturer, must have known about as there was a clarification on contradictions between the two booklets!

Anyway after much flicking, pondering and scratching of noggins the fleets advanced.
A ponderous advance

Turn 2
This took even longer as we worked out what we had done wrong in the previous round and had to handle the first round of shooting. This was actually straight forward enough utilising some of the now familiar custom D8s that come with this and other Fantasy Flight products. The Star Destroyer's frontal batteries quickly knocked out the front shields of the Nebulon cruiser.

Some shooting!

Turn 3
The one turn where everything seemed to be in range. The corvette started the action off by taking out two (of three) of the Star Destroyer's shields. In response the Imperial ship blasted the corvette with it's port batteries nicking the rear shields of the rebel vessel. It then unleashed more attacks on the Nebulon, doing actual hull damage and a critical hit on the ship's shield generators.

Then the fighters clashed and all I can say is I wouldn't want to be a TIE fighter pilot. Those X-wings were mean taking down two squadrons of TIEs almost immediately. There was some response from the Imperials with an X-wing squadron being obliterated but if I had been in that navy (and with my accent that would be likely) I would have been hyper-spacing out of there!

This turned out to be the height of the battle

Turns 4-6
The issue now was that everybody had to turn and this took time (especially for the Star Destroyer). There was also the question of the table size for the Imperial ship there was a real danger that it would fall of the edge of the universe.
Turn, turn, turn...

The fighters continued to engage and the TIEs even managed to get in a few shots at the Nebulon cruiser.

Unfortunately the hiatus also allowed those ships that were damaged to recover shields which in effect meant that, apart for the dwindling fighter forces - which had had minimal impact on the capital ships - everything recovered.
Fighters still engaged

The game was supposed to conclude at the end of turn six but with no clear result a couple of further turns were agreed.

Turns 7-8
Finally two of the capital ships get back in range
The corvette and Star Destroyer passed each other but were unable to dent each others shields and the game petered out to a draw.
But damage is minimal

Conclusion
It might not sound like it but I actually enjoyed this and it definitely had that Star Wars feel (I was told off repeatedly for humming the Imperial March). I have a feeling that we were not applying the damage rules properly and that may have caused the issue. A bigger playing area and a better appreciation of the ships in play would also help. A re-read of the rules, especially now that I'm aware of the areas causing me confusion is also in order.


Sunday, 11 February 2018

Dumfries October 2017 - part 2

Previously on Khaki Drab...

In the first game at the League of Augsburg Dumfries October 2017 weekender, a motley group of Pirates, Natives and Huguenots attacked and destroyed the rum production facility on the Honey River.

But this was a feint and the main attack took place a few months later.

Except it really wasn't really an attack more of a Tarantino-esque saga  of double dealing, betrayal and mild violence that if filmed would no doubt be entitled "Kill Kirke".


The initial set up, Mr Barry Hilton organiser extraordinaire in the background
The protagonists were:
Attackers:
  • An expeditionary force of noble Huguenots exiled from their homeland and searching for a new home and a peaceful life(I typed that with a straight font),
  • perfidious English supporters of the pretender James (the Huguenot allies);
Huguenots advance!
  • pirates with their own agenda which had something to do with picks and shovels;
  • natives who were tired of the Bourbon yoke and dreamed of nothing more than their own rum soaked republic in the sun.
Natives defend a mill
Defenders:
  • The colonial forces of the treacherous Bourbon king Louis led by a former Huguenot.
Unknown:
  • Mysterious British force whose commander had revenge in mind.
The game started and that's where the complexity kicked in. I'll try and summarise though obviously my viewpoint is through Huguenot tainted glasses.

  • The Huguenots not trusting Kirk's English forces posted Huguenot officers with their trusted English allies;
  • Various accidents then occurred with both English and Huguenot officers falling down cliffs, bathing with crocodiles etc.
  • The French and Huguenot's came to an arrangement not to attack each other;
A lot of marching... not a lot of shooting
  • After taking a fort from the French the natives joined this entente cordiale;
  • Unfortunately, the natives had lost all the forces attacking the fort which the Huguenots then sauntered into and refused to give back;
One fort, fully supplied with excellent views of the sea
  • The natives took exception to this and started sniping at the Huguenots;
  • Percy Kirke appeared on the field and this galvanised all the other players;
That's a familiar standard
  • Despite the best efforts of at least three of the players (my Huguenots were strangely ambivalent) Kirke escapes to betray another day;
Kirke's last stand?
  • The other protagonists decide to set up a joint venture with their target Jamaica... but that's another story.
Will Kirke return to fight again?
Will the new Caribbean Republic flourish?
Will the Huguenots actually discharge their muskets or will the new hobby of Peace-gaming catch on?

To be continued (if the organisers choose to do so) at the next League of Augsburg weekend.

Sunday, 5 November 2017

Dumfries October 2017 - part 1

This was a continuation of the 1692/3 campaign that had been played out at the previous two  League of Augsburg campaigns.

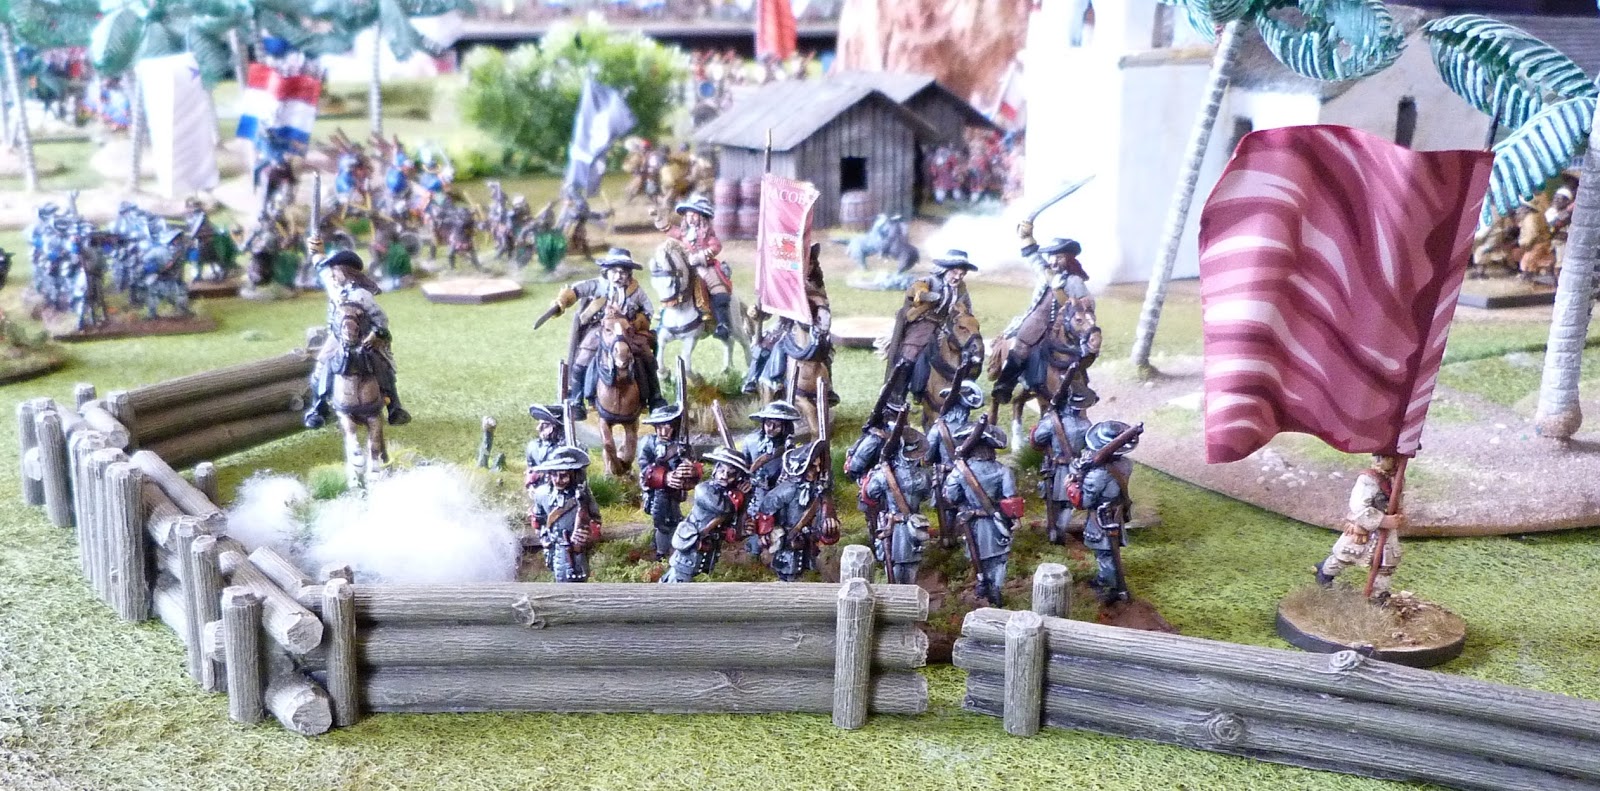
The valiant Huguenots  were still in the Caribbean enjoying the sun, sea and yellow fever. For this weekend they had teamed up with the infamous Percy Kirke , some pirates and locals to have a go at wresting parts of Haiti away from the French.

First up was a raid on some sugary refineries and a rum factory.

The rum factory on the Honey River

As well as setting fire to the sugar refineries and rum repository there were a number of carts to get off table

The Colonel's company awaits the French

The French approach

Carts start to make their way off table

A final stand off
The raid was successful and the Huguenot's and their piratical allies made off with half the carts and left a trail of destruction behind them.

There are a lot more photos and information on the League of Augsburg blog.

Sunday, 8 October 2017

Dumfries March 2017 - Part 2

With the next weekender coming up, I realised that I hadn't posted all my photos from the last one! I'd like to come up with an excuse other than work and the twinnage but, alas, I'm not that imaginative.

So here's a few shots of the Caribbean expedition. Watch out for photographic evidence of the first BLB unit ever to be routed by the local fauna (my die rolling as ever knew no shame).


And meanwhile back in not so Merry England...


Sunday, 16 July 2017

Dumfries March 2017 Part 1

 
Another weekend of mayhem, musketry and in my case catastrophic die rolling. This time  Barry and Bob of the League of Augsburg had a little vacation in mind for my Huguenots. It was time to pack the sun screen and get those yellow fever shots - Jamaica was the destination.

The first game was a short affair that didn't go very well for the Huguenot's or their Dutch West Indies Company allies. Against them were some Jacobite forces lead by the infamous Kirke.


Time for a nice walk in the jungle
The Governor's forces await the Williamite onslaught
The long and winding road
The Dutch West Indies Company encounter some hungry locals
Not all the fauna were quite as interactive
There was only one cavalry detachment on the board and although of dubious quality proved highly effective
The Huguenots fail to take their objective and are reduced to trading volleys
This was just the warm-up engagement, there was more to come with heroism, treachery and Haitian pygmy death cults...

Sunday, 20 November 2016

Dumfries 2016 - Opening Skirmish

Dumfries 2016 saw some major updates to the Beneath the Lily Banners rules set. In order to get all participants into the swing of these the first engagements were a set of small encounters (small for a League of Augsburg weekend that is, still big to me).


A regiment of Highlanders advances
The battle I participated in was set on the Scottish border (appropriately given the hotel location) where a contingent of Scottish Jacobites led by that bonniest of Bonnie Dundees (newly resurrected from Killikrankie) Jim Wallace, aided by French units led by Les Rumble playing the part of the Marquis de St Ruhe, another 'newly raised' member of the aristocracy.

The Jacobites and French prepare to advance
If this hadn't been an historical game I might have accused the Jacobites of employing some dark magicks.

The WIlliamites were led by General MacKay in the form of his alter ego Bill Robertson. Bill was to prove over the course of the weekender to be (to quote Blackadder), "more cunning than a fox who has just been made Professor of Cunning at Oxford University".

More of which in a later post.

I was in the role of the Marquis de Ruvigny who had assumed command of the Huguenot regiments.

Huguenot cavalry ready for the fight - they didn't get one!
The scenario was simple; the Williamite forces held two redoubts and a star fort, the Jacobites had to get past them.

The fort blocking the Jacobite advance

For my Huguenots it would very much prove to be a game of two halves.

The highlanders rapidly advanced on the redoubt on the Williamite right flank held by Belcastel's regiment under the personal command of their Brigadier. Sportingly the umpire allowed two Jacobite units to charge poor Belcastel's regiment. Highlanders against All Musket foot, it got messy very quickly if you were a Huguenot.

The moment before the Highland tsunami smashed into the left redoubt

Naturally, me being me, my first test for a Brigadier casualty of the weekend resulted in another one being entered in the roll of honour. His regiment was subsequently chopped into fine haggis by the claymores' of the clansmen. There were no survivors.

Buoyed by their overwhelming success at the redoubt, Bonnie Dundee's troops swarmed forward but were held by other elements of MacKay's division.

The Williamite right flank was a more salubrious affair mostly due to Les' die rolling for orders; I'd advise against that visit to Vegas anytime soon.

A Williamite cannon patiently waits for a French target to meander by
When the French finally reached the second redoubt it became obvious where the dice luck had gone. Needing 6+ on D10s Du Cambons regiment managed an 80% strike rate on their first volley putting one regiment to flight in a single round.

The Huguenot version of Rorke's Drift
They then proceeded to wipe out some pesky dragons whilst the French musketry and artillery pinged away with little or no effect under the new hard cover rules (aided once more by Les' die rolling).

Lunchtime approached, the smoke cleared and the umpires declared a draw.

Sunday, 8 May 2016

League of Augsburg - Leipzig Part 2

In my earlier post on this game I promised a few more photographs and some explanation as to why Monsieur Murat was swanning around in the river.

The layout was straightforward - the villages of Dosen and Dolitz formed strong points to the front of the French lines then behind a river sat the main French strong point of Probstheida.

Allied forces use a duplicitous dice disguise to sneak up on the sleeping Italians.
Initially the French strategic plan was to fight to the last Italian though the ones on the left flank clearly didn't get those orders. Having missed an early morning Cossack caller as their commander was 'indisposed' these chaps proceeded to have a balmy day of sitting around idly speculating what all the noise and smoke was about, whilst the entire Allied army waltzed passed without hindrance.

Dear Mamma, Having a relaxing time in Saxony. Weather good though neighbours noisy - Dosen at the end of the battle

The Italians at Dolitz initially proved equally lackadaisical. It was foggy and an entire Russian brigade managed to sneak past the pickets and blunder into the only deployed French battery who were annihilated without a shot being fired.

The Italians in Dolitz decide whether or not to make a last stand of it...
The contest for Dolitz was short lived with the Italians either following the Emperor's instructions to the letter and dying to a man or succumbing to stereotype and running at the sight of anything resembling an Austrian or Prussian trooper.

The Austrians a bit like the no22 bus - wait all day then 50,000 turn up at once.
Murat had his warning and whilst attached to a Neapolitan infantry battalion became the first officer under my command to have something positive happen when rolling for officer casualties. Yes! In the next round of combat the troops were to be inspired by their King's heroism (or perhaps dress sense) and get a +1 modifier to morale!

Unfortunately, there weren't any men left to benefit from this unheard of circumstance.

Murat escaped the infantry's annihilation and headed for the bridge but whilst trying to force his way through a couple of untouched but unnerved brigades he was toppled into the river by a sharp elbowed private with an eye for advancement (a man after my own heart!).

The crush on the bridge
Thus the fate of the King of Naples was sealed (mirroring that of Prince Poniatowski at the same battle).


Murat takes an early bath
The rest of the engagement was taken up by two major events, the first was the dogged Allied assault on Probstheida which was defeated more by the river, marsh and steep approach than the valour of the French. The second was an almighty cavalry jam which prevented my cuirassier brigade from charging a few cheeky Jaeger who had nipped up the hill to take some pot shots.

The combination of marsh and a steep slope prove too much for the Allies
Finally the road did clear and after two and a half hours my cavalry moved into charge range but, before tests could be thrown, the commanders declared a draw.

Final Score:
Kings of Naples: 0
Killer Colin:        1